
getMeasuredWidth()获取的是view原始的大小,也就是这个view在XML文件中配置或者是代码中设置的大小。getWidth()获取的是这个view最终显示的大小,这个大小有可能等于原始的大小也有可能不等于原始大小。
从源码上开始分析一下这两个方法的区别。首先来看一下getMeasuredWidth()这个方法。
1   public final int getMeasuredWidth() {
 2         return mMeasuredWidth & MEASURED_SIZE_MASK;
 3     }
 4
 5   protected void onMeasure(int widthMeasureSpec, int heightMeasureSpec) {
 6         setMeasuredDimension(getDefaultSize(getSuggestedMinimumWidth(), widthMeasureSpec),
 7                 getDefaultSize(getSuggestedMinimumHeight(), heightMeasureSpec));
 8     }
 9
10   protected final void setMeasuredDimension(int measuredWidth, int measuredHeight) {
11         boolean optical = isLayoutModeOptical(this);
12         if (optical != isLayoutModeOptical(mParent)) {
13             Insets insets = getOpticalInsets();
14             int opticalWidth  = insets.left + insets.right;
15             int opticalHeight = insets.top  + insets.bottom;
16
17             measuredWidth  += optical ? opticalWidth  : -opticalWidth;
18             measuredHeight += optical ? opticalHeight : -opticalHeight;
19         }
20         setMeasuredDimensionRaw(measuredWidth, measuredHeight);
21     }
22
23   private void setMeasuredDimensionRaw(int measuredWidth, int measuredHeight) {
24         mMeasuredWidth = measuredWidth;
25         mMeasuredHeight = measuredHeight;
26
27         mPrivateFlags |= PFLAG_MEASURED_DIMENSION_SET;
28     }
从源码上来看,getMeasuredWidth()获取的是mMeasuredWidth的这个值。这个值是一个8位的十六进制的数字,高两位表示的是这个measure阶段的Mode的值,具体可以查看MeasureSpec的原理。这里mMeasuredWidth & MEASURED_SIZE_MASK表示的是测量阶段结束之后,view真实的值。而且这个值会在调用了setMeasuredDimensionRaw()函数之后会被设置。所以getMeasuredWidth()的值是measure阶段结束之后得到的view的原始的值。
再来看看getWidth()的源码:
1   public final int getWidth() {
2         return mRight - mLeft;
3     }
那么问题来了,mRight和mLeft是什么值,是在什么时候被设置的。我们再看layout阶段的源码:
1   public void layout(int l, int t, int r, int b) {
 2         if ((mPrivateFlags3 & PFLAG3_MEASURE_NEEDED_BEFORE_LAYOUT) != 0) {
 3             onMeasure(mOldWidthMeasureSpec, mOldHeightMeasureSpec);
 4             mPrivateFlags3 &= ~PFLAG3_MEASURE_NEEDED_BEFORE_LAYOUT;
 5         }
 6
 7         int oldL = mLeft;
 8         int oldT = mTop;
 9         int oldB = mBottom;
10         int oldR = mRight;
11
12         boolean changed = isLayoutModeOptical(mParent) ?
13                 setOpticalFrame(l, t, r, b) : setFrame(l, t, r, b);
14
15       ...
16 }
在layout阶段会去调用setOpticalFrame()或者调用setFrame()方法,从源码中可知setOpticalFrame()方法,最终还是调用的setFrame()方法。
1   protected boolean setFrame(int left, int top, int right, int bottom) {
 2         boolean changed = false;
 3
 4         if (DBG) {
 5             Log.d("View", this + " View.setFrame(" + left + "," + top + ","
 6                     + right + "," + bottom + ")");
 7         }
 8
 9         if (mLeft != left || mRight != right || mTop != top || mBottom != bottom) {
10             changed = true;
11
12             // Remember our drawn bit
13             int drawn = mPrivateFlags & PFLAG_DRAWN;
14
15             int oldWidth = mRight - mLeft;
16             int oldHeight = mBottom - mTop;
17             int newWidth = right - left;
18             int newHeight = bottom - top;
19             boolean sizeChanged = (newWidth != oldWidth) || (newHeight != oldHeight);
20
21             // Invalidate our old position
22             invalidate(sizeChanged);
23
24             mLeft = left;
25             mTop = top;
26             mRight = right;
27             mBottom = bottom;
28             mRenderNode.setLeftTopRightBottom(mLeft, mTop, mRight, mBottom);
29
30             mPrivateFlags |= PFLAG_HAS_BOUNDS;
31    ...
32 }
所以最终的mLeft和mRight的值是在setFrame()方法中被设置的。而且这些mLeft,mRight代表了view最终显示在界面中的大小。
下面我们自定义一个简单的ViewGroup,在layout阶段改变left,right的值,观察getMeasuredWidth()和getWidth()方法之间的区别。
1 package com.gearmotion.app.customviewgroup;
 2
 3 import android.content.Context;
 4 import android.util.AttributeSet;
 5 import android.view.View;
 6 import android.widget.RelativeLayout;
 7
 8 /**
 9  * Created by Charles on 2015/11/21.
10  */
11 public class CustomViewGroup extends RelativeLayout {
12
13     public CustomViewGroup(Context context) {
14         super(context);
15     }
16
17     public CustomViewGroup(Context context, AttributeSet attrs) {
18         super(context, attrs);
19     }
20
21     public CustomViewGroup(Context context, AttributeSet attrs, int defStyleAttr) {
22         super(context, attrs, defStyleAttr);
23     }
24
25     @Override
26     protected void onMeasure(int widthMeasureSpec, int heightMeasureSpec) {
27         super.onMeasure(widthMeasureSpec, heightMeasureSpec);
28     }
29
30     @Override
31     protected void onLayout(boolean changed, int l, int t, int r, int b) {
32         super.onLayout(changed, l, t, r, b);
33         View child = this.getChildAt(1);  //the textview
34         //add 100px for right
35         child.layout(child.getLeft(), child.getTop(),child.getRight() + 100,child.getBottom());
36
37
38     }
39
 version="1.0" encoding="utf-8"?>
com.gearmotion.app.customviewgroup.CustomViewGroup xmlns:android="http://schemas.android.com/apk/res/android"
    xmlns:tools="http://schemas.android.com/tools"
    android:layout_width="match_parent"
    android:layout_height="match_parent"
    tools:context="com.gearmotion.app.customviewgroup.MainActivity">

    LinearLayout
        android:layout_width="match_parent"
        android:layout_height="wrap_content"
        android:orientation="horizontal">

        Button
            android:id="@+id/left"
            android:layout_width="0dp"
            android:layout_height="wrap_content"
            android:layout_weight="1"
            android:gravity="center"
            android:text="width" />

        Button
            android:id="@+id/right"
            android:layout_width="0dp"
            android:layout_height="wrap_content"
            android:layout_weight="1"
            android:gravity="center"
            android:text="measuredWidth" />
    LinearLayout>

    TextView
        android:id="@+id/textview"
        android:layout_width="100px"
        android:layout_height="wrap_content"
        android:layout_centerInParent="true"
        android:background="#8EE5EE"
        android:gravity="center"
        android:text="textview" />

com.gearmotion.app.customviewgroup.CustomViewGroup>
package com.gearmotion.app.customviewgroup;
import android.support.v7.app.AppCompatActivity;
import android.os.Bundle;
import android.view.View;
import android.widget.Button;
import android.widget.TextView;
import android.widget.Toast;
public class MainActivity extends AppCompatActivity implements View.OnClickListener {
TextView mTextView;
Button mLeftBtn;
Button mRightBtn;
@Override
protected void onCreate(Bundle savedInstanceState) {
super.onCreate(savedInstanceState);
setContentView(R.layout.activity_main);
mTextView = (TextView) this.findViewById(R.id.textview);
mLeftBtn = (Button) this.findViewById(R.id.left);
mRightBtn = (Button) this.findViewById(R.id.right);
mLeftBtn.setOnClickListener(this);
mRightBtn.setOnClickListener(this);
}
@Override
public void onClick(View v) {
int id = v.getId();
switch (id) {
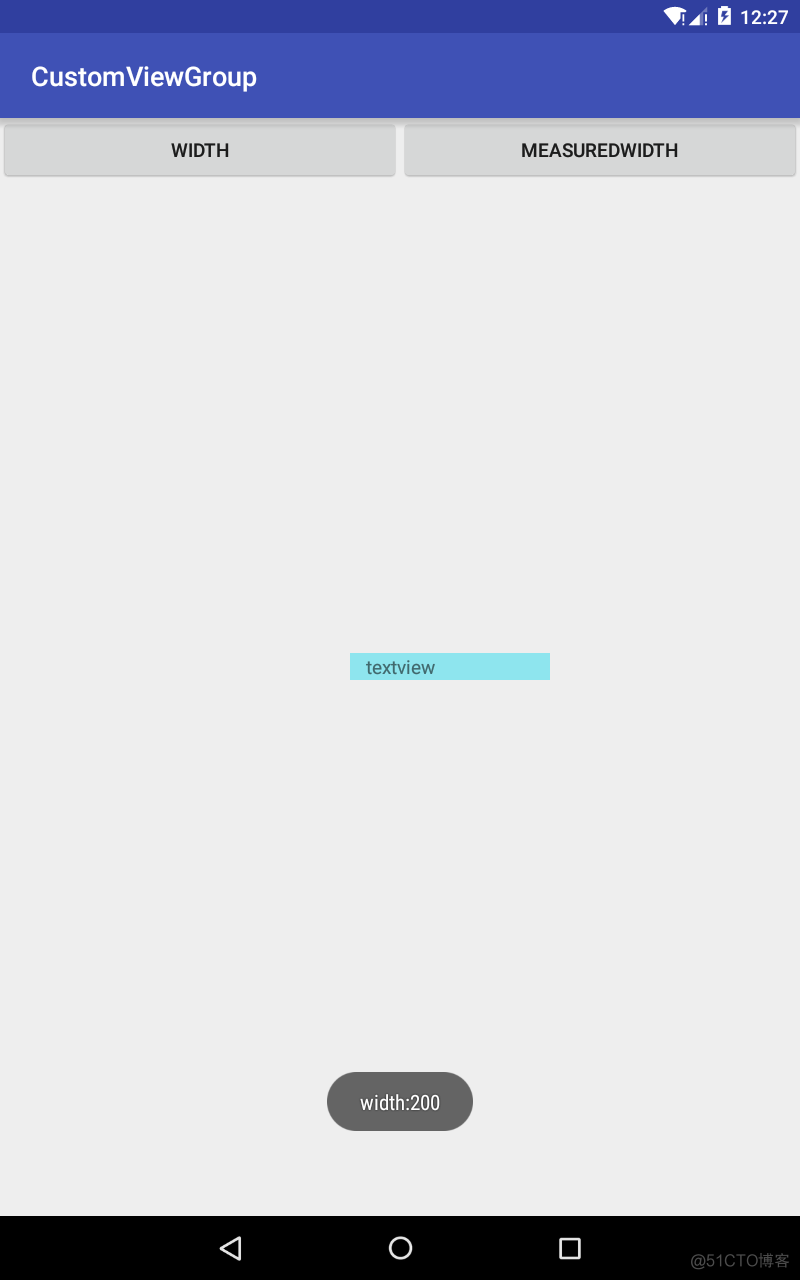
case R.id.left: //width
Toast.makeText(MainActivity.this, "width:" + mTextView.getWidth(), Toast.LENGTH_SHORT).show();
break;
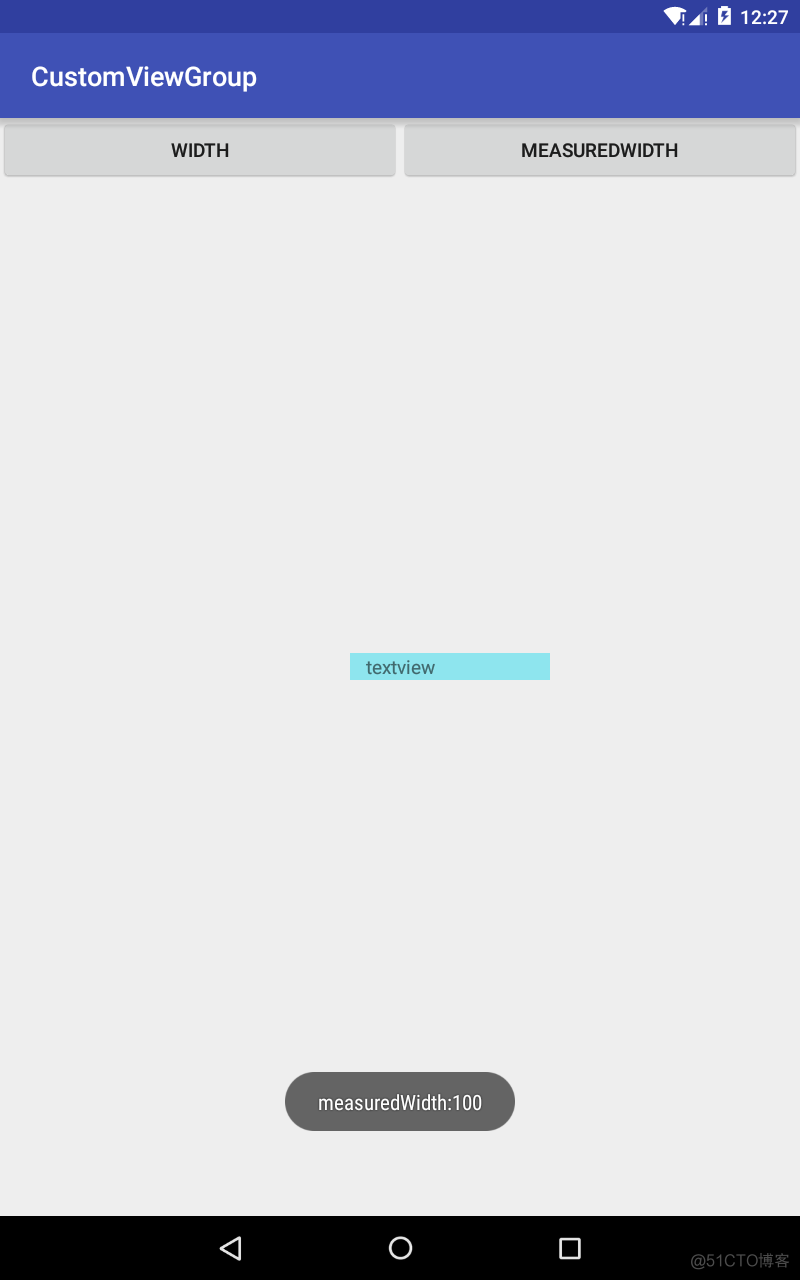
case R.id.right: //measuredWidth
Toast.makeText(MainActivity.this,"measuredWidth:"+mTextView.getMeasuredWidth(),Toast.LENGTH_SHORT).show();
break;
}
}
}
在这个demo中,我们给textview设置宽度为100px,但是在layout阶段给它加大到200,最终结果是:点击width按钮,显示为200,点解measuredWidth按钮显示为100.
服务器托管,北京服务器托管,服务器租用 http://www.fwqtg.net
机房租用,北京机房租用,IDC机房托管, http://www.e1idc.net